

Start a scan
1
Open the Bugs page
Select your project in the project switcher, then click Bugs in the sidebar under Runs. Click New scan. If the project has never been scanned, click Scan for bugs instead.The Discover new tests dialog opens with Find bugs selected.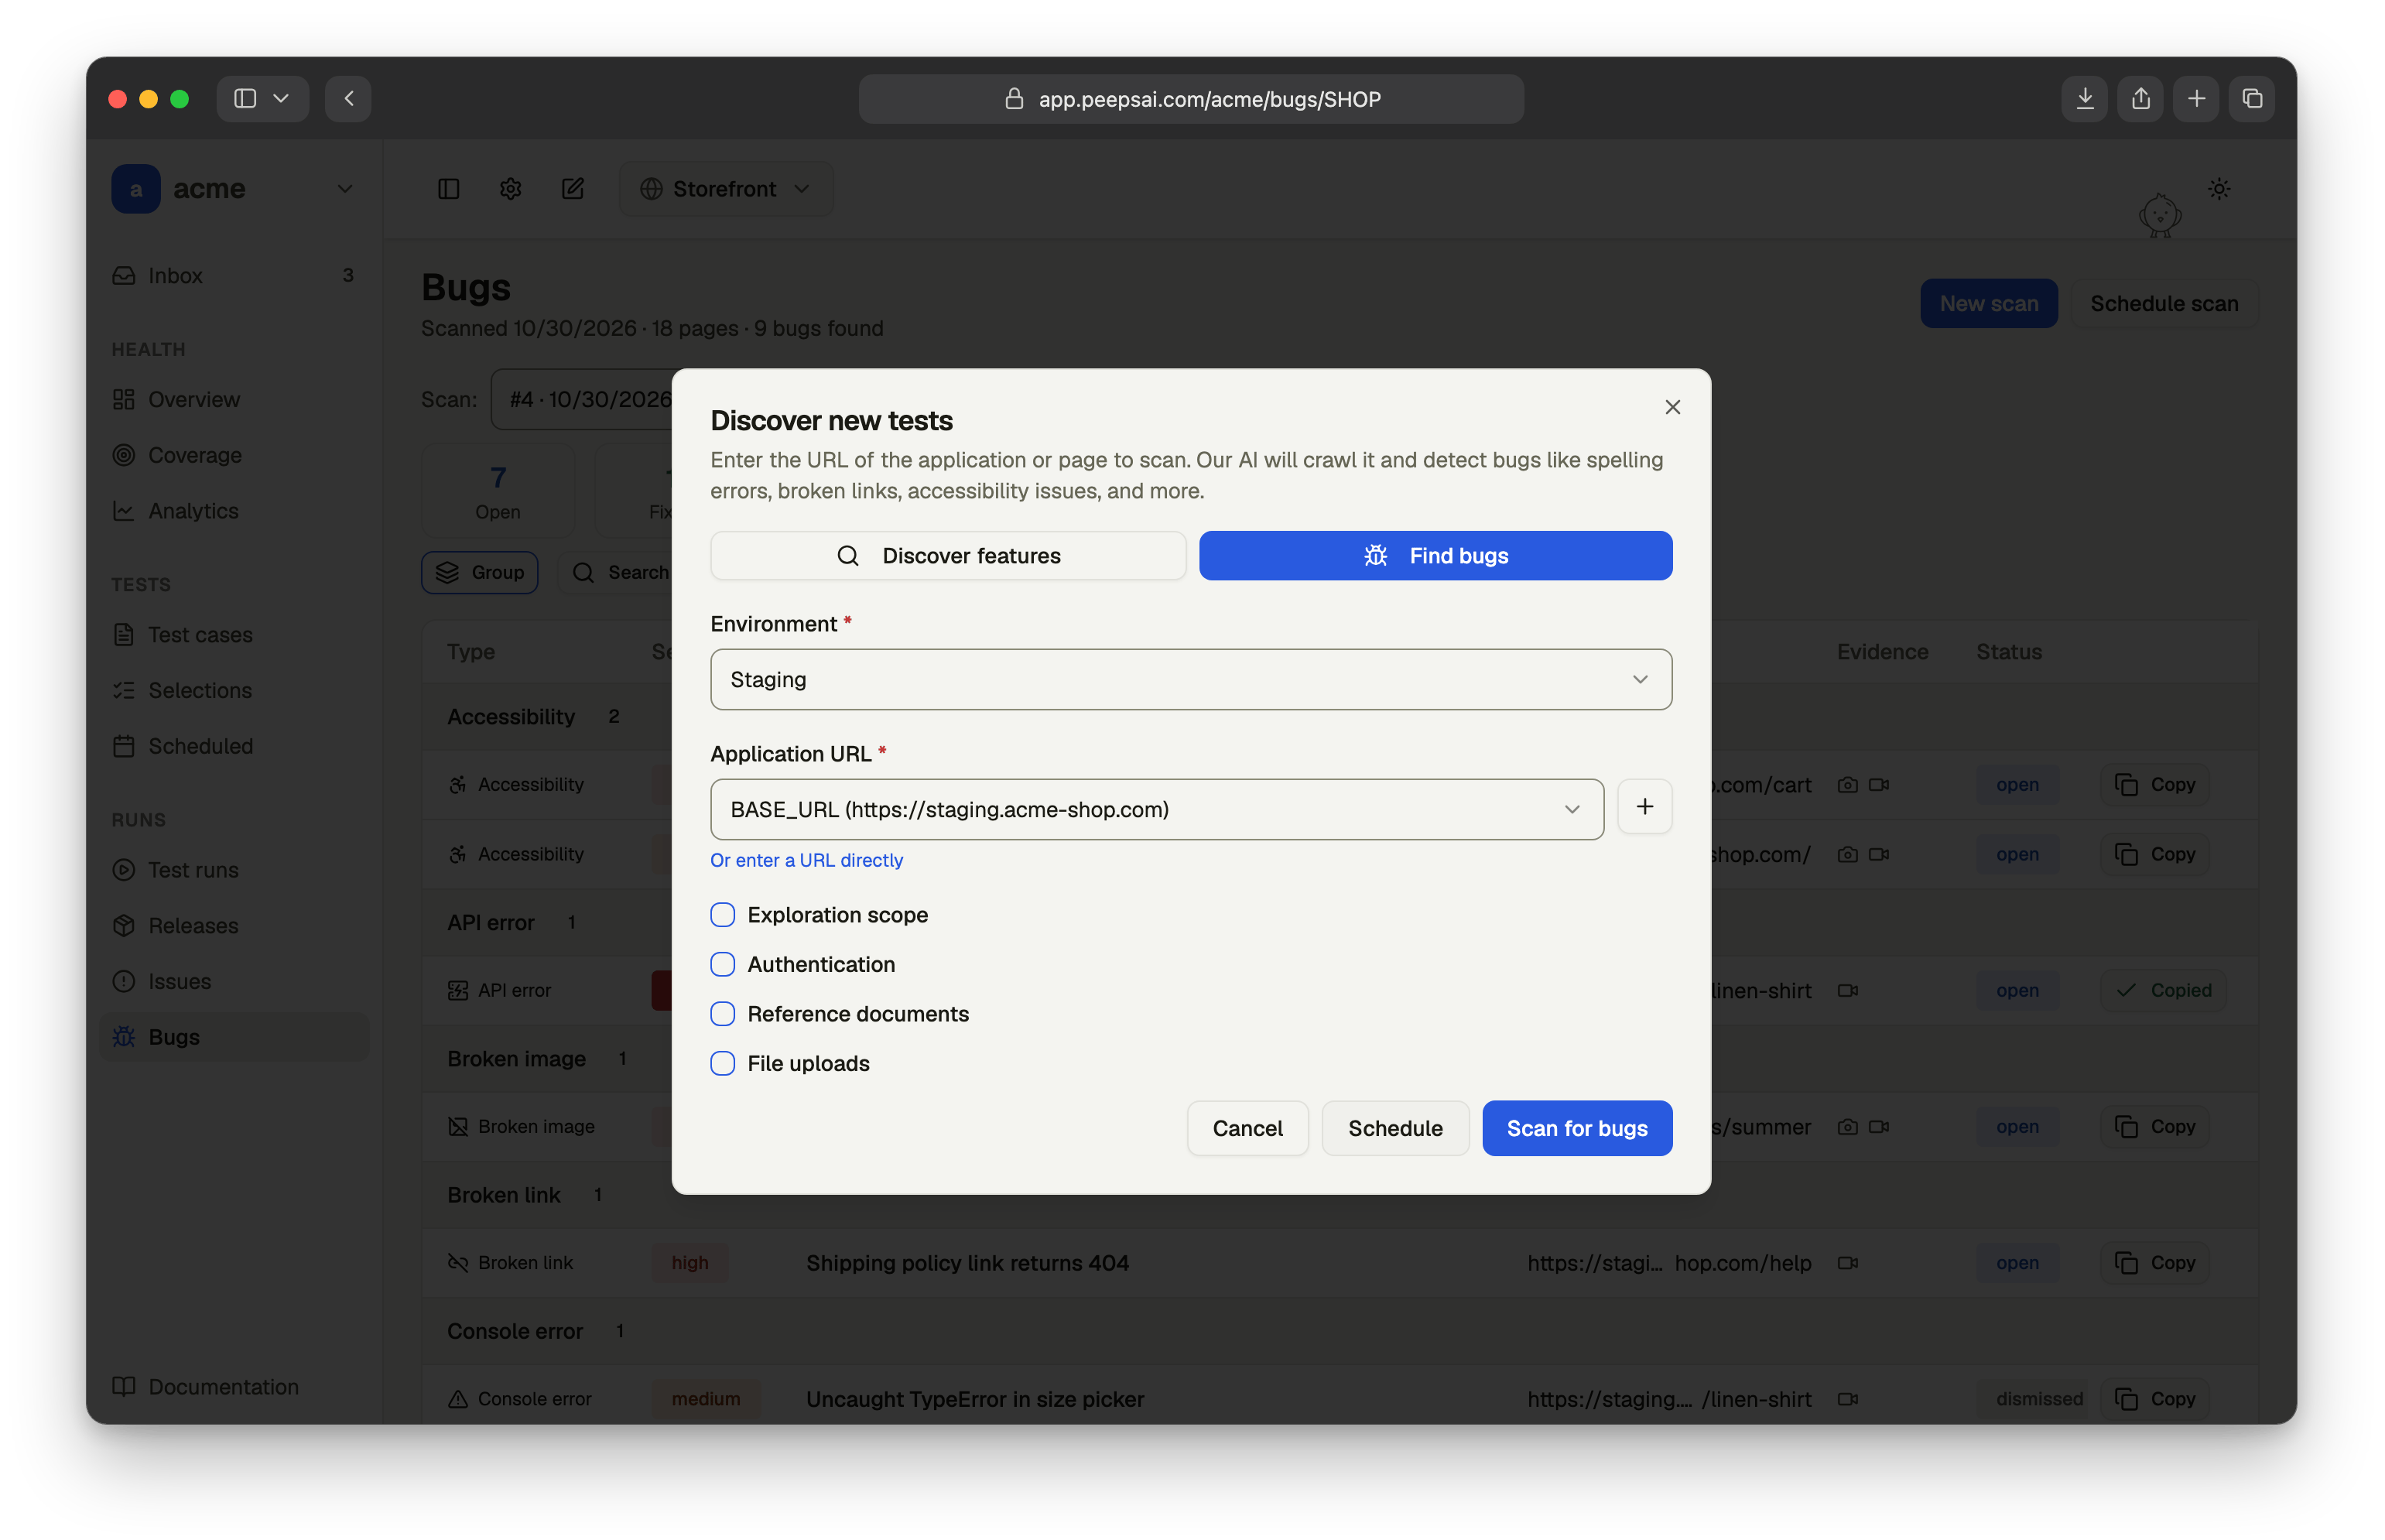
2
Choose an environment
Pick an environment under Environment. An environment is required, because sign-in details and files come from its variables. To make one, choose Create new environment, type a name such as
staging, and click Create.3
Set the application URL
Under Application URL, pick a URL variable from the environment, or click + to add one. To type an address instead, click Or enter a URL directly.The agent starts at this URL. It can be your app’s home page or a deeper page, such as
https://staging.example.com/login.4
Add options, if you need them
Four optional sections sit below the URL. Tick a section’s checkbox to open it:
- Exploration scope narrows where the agent looks.
- Authentication signs the agent in to your app.
- Reference documents give the agent your specs.
- File uploads let the agent test upload fields.
5
Start the scan
Click Scan for bugs. Peeps opens the scan’s progress page.To run the same scan on a timetable instead, click Schedule. See Schedule scans.
Exploration scope
By default, the agent explores everything it can reach from the starting URL. Tick Exploration scope to choose how it explores instead.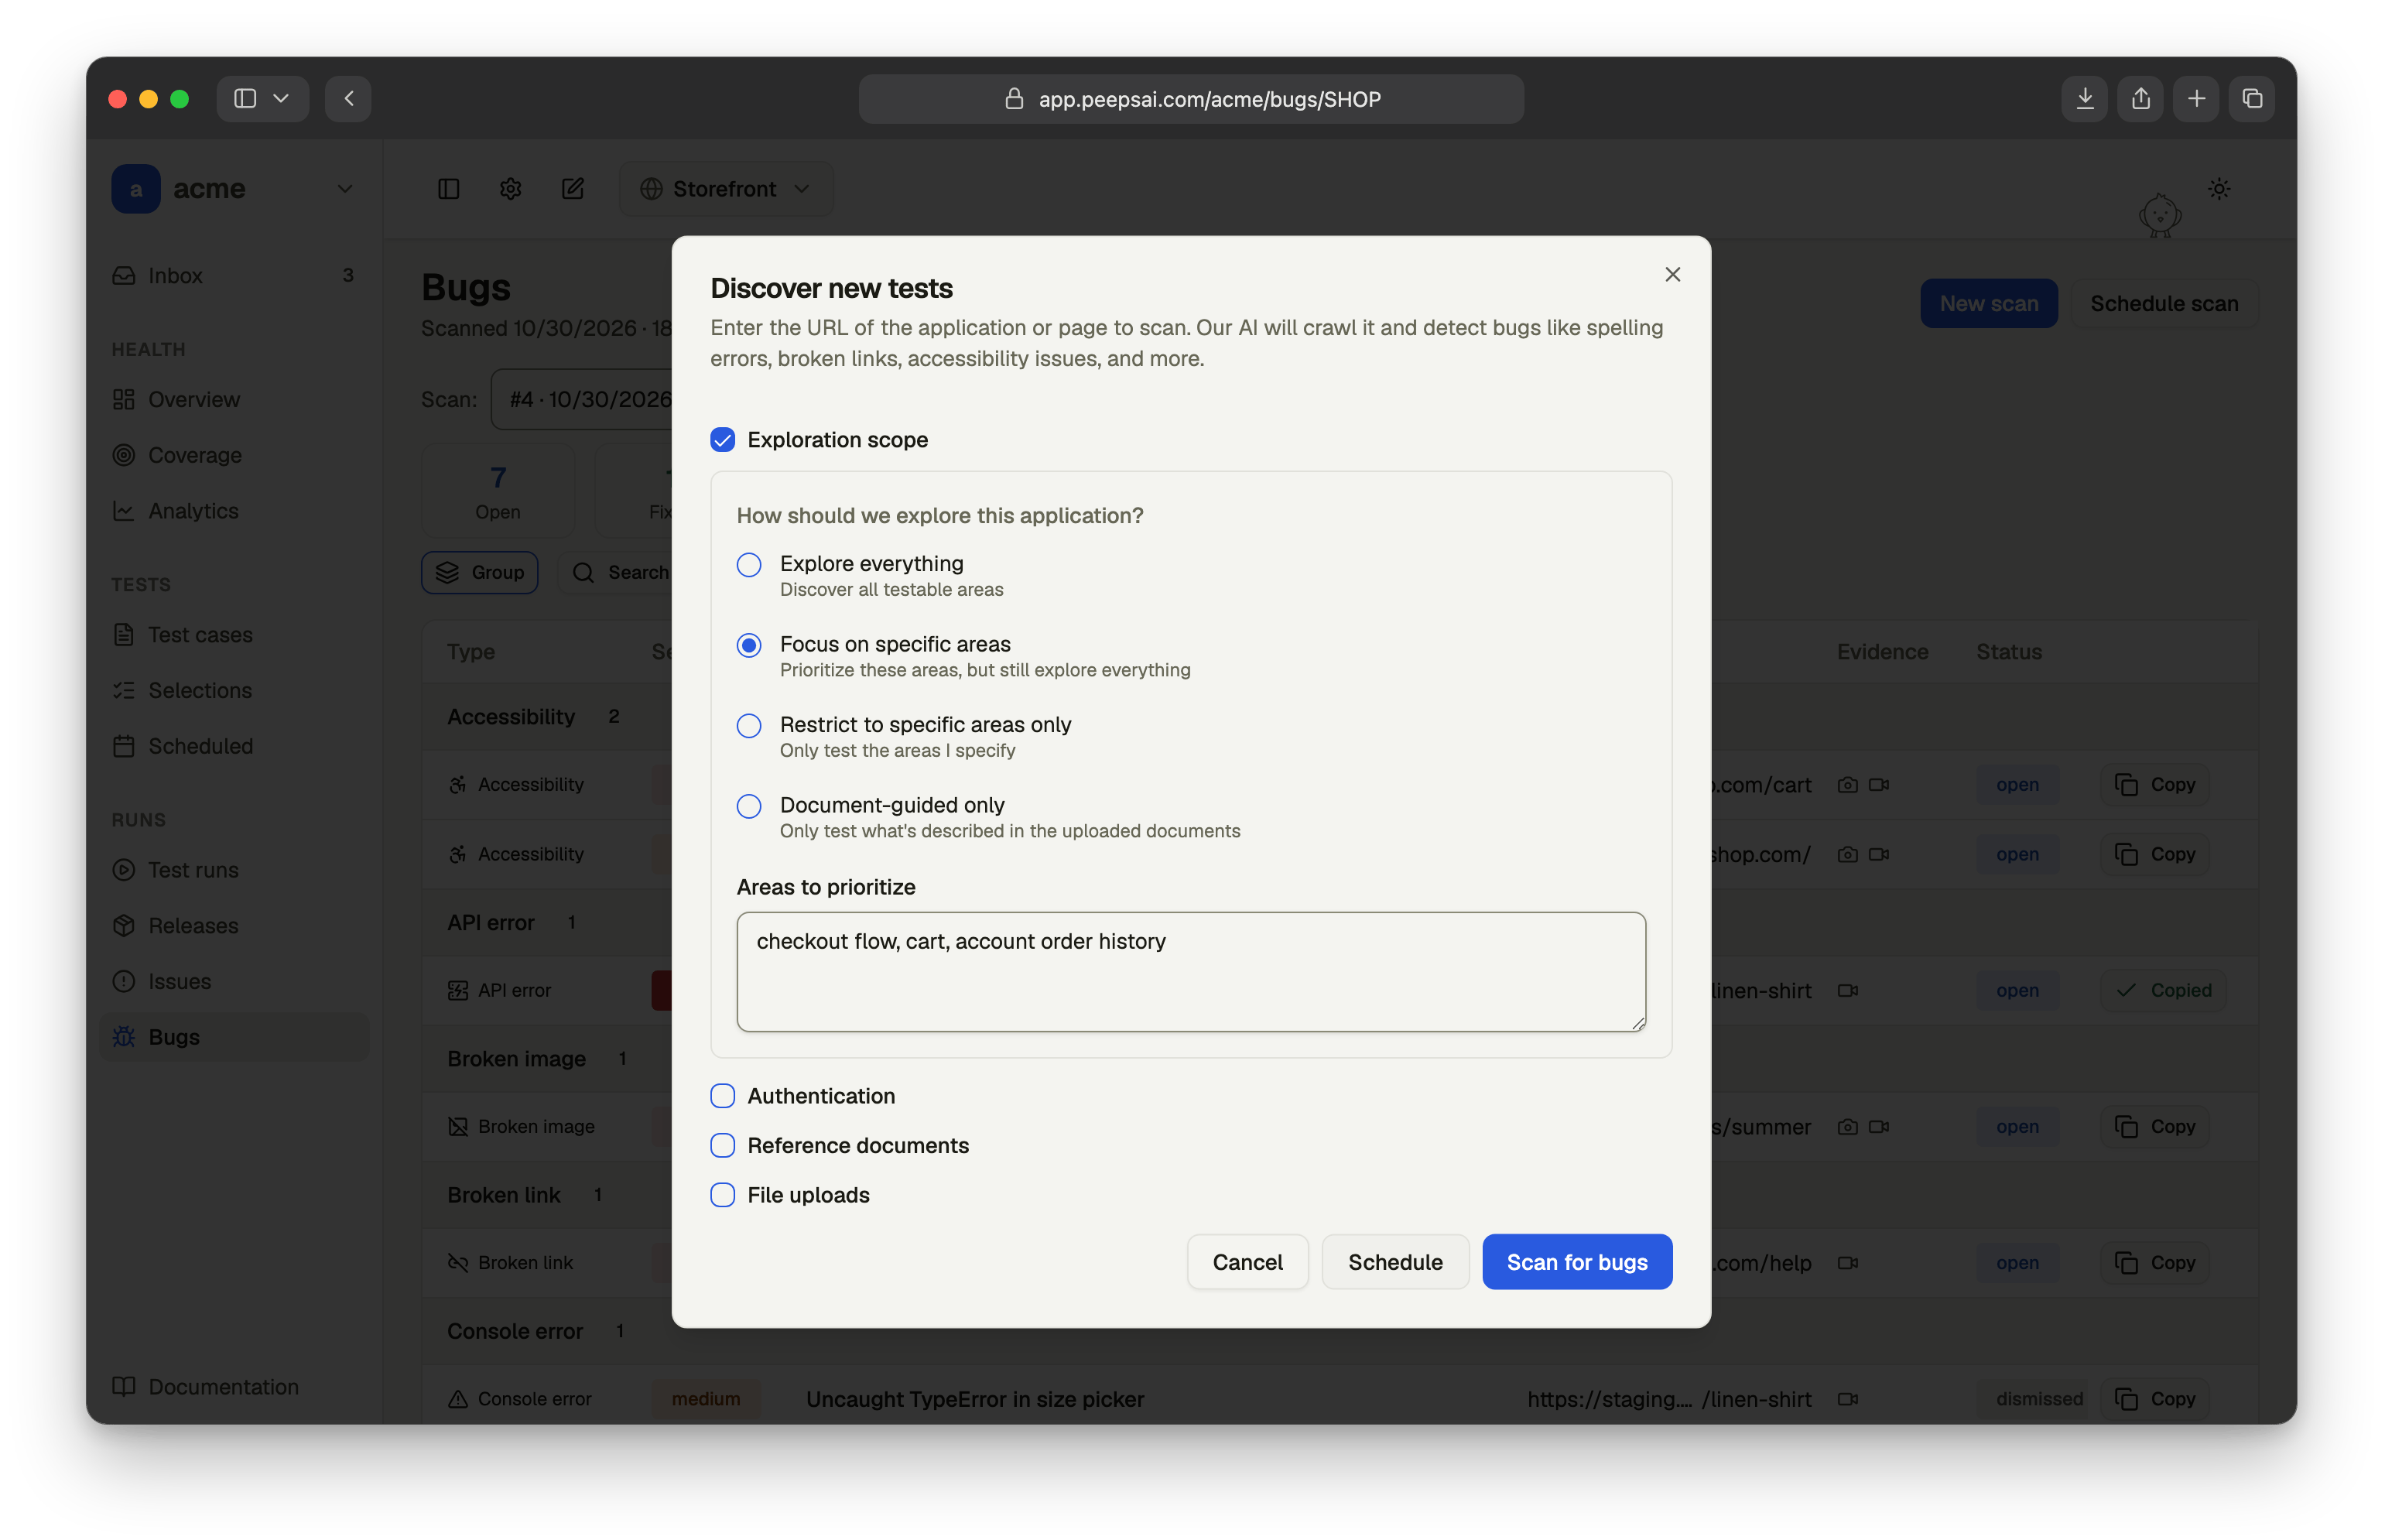
For Focus and Restrict, list the areas in plain words, such as
checkout flow, cart, account order history. The list can be up to 1,000 characters. Document-guided only needs at least one reference document, and the text box becomes optional guidance.
Sign in to your app
To scan pages behind a login, tick Authentication. The agent signs in with test-account details stored as variables in the environment you picked, so you never type a password into the scan itself.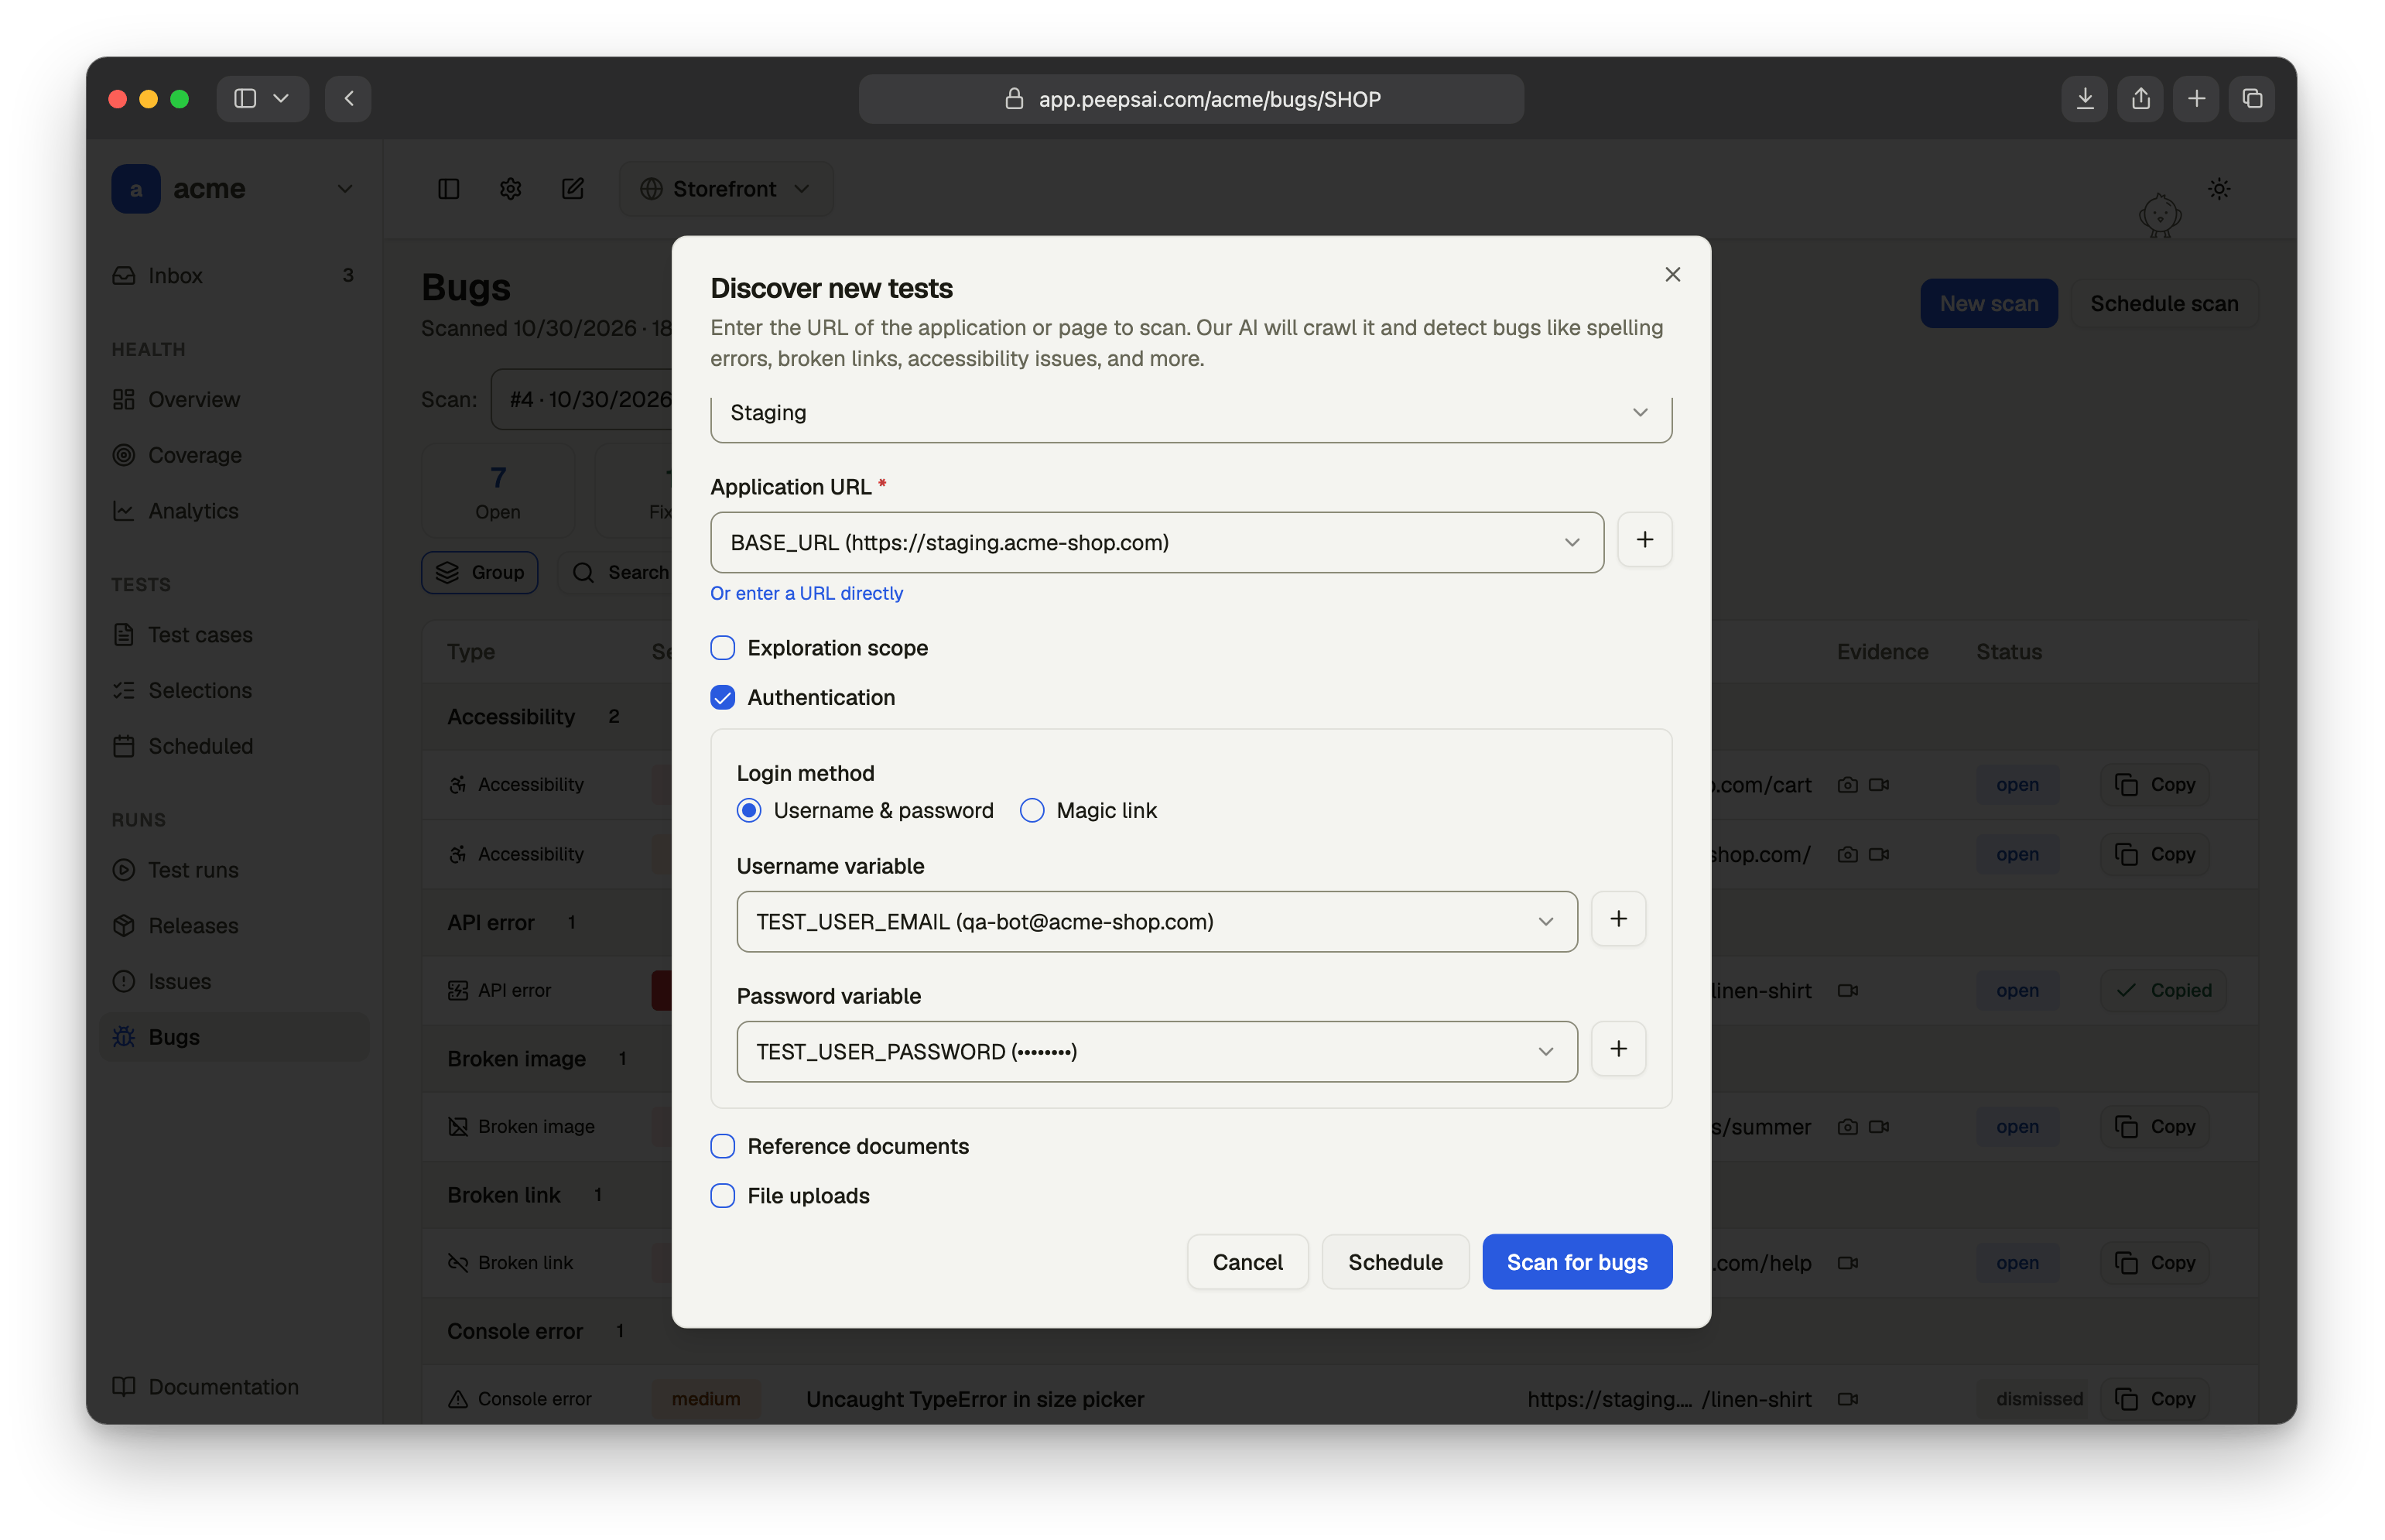
- Username & password
- Magic link
Select Username & password, then choose a Username variable and a Password variable. The username variable must be of type username or email, and the password variable must be of type password. Click + next to a field to add a variable.The agent signs in when it reaches a login page, then scans both the public pages and the pages behind the login.
Reference documents
Tick Reference documents to give the agent your product specs or PRDs. It uses them to learn how your app should behave, and reports where the app differs from them. The section lists the project’s context documents. A document becomes selectable once Peeps has extracted its text, shown as Extracted. Click Upload document to add a new one. You can select up to 10 documents per scan.File uploads
Tick File uploads to let the agent test upload fields. Choose a file variable from the environment, or click Add file variable to upload a file. The agent uploads that file into any upload field it finds, and reports the field as a bug if the upload fails.Follow the scan
While the scan runs, its progress page shows each step the agent takes, such as Running accessibility audit or Scanning /settings page.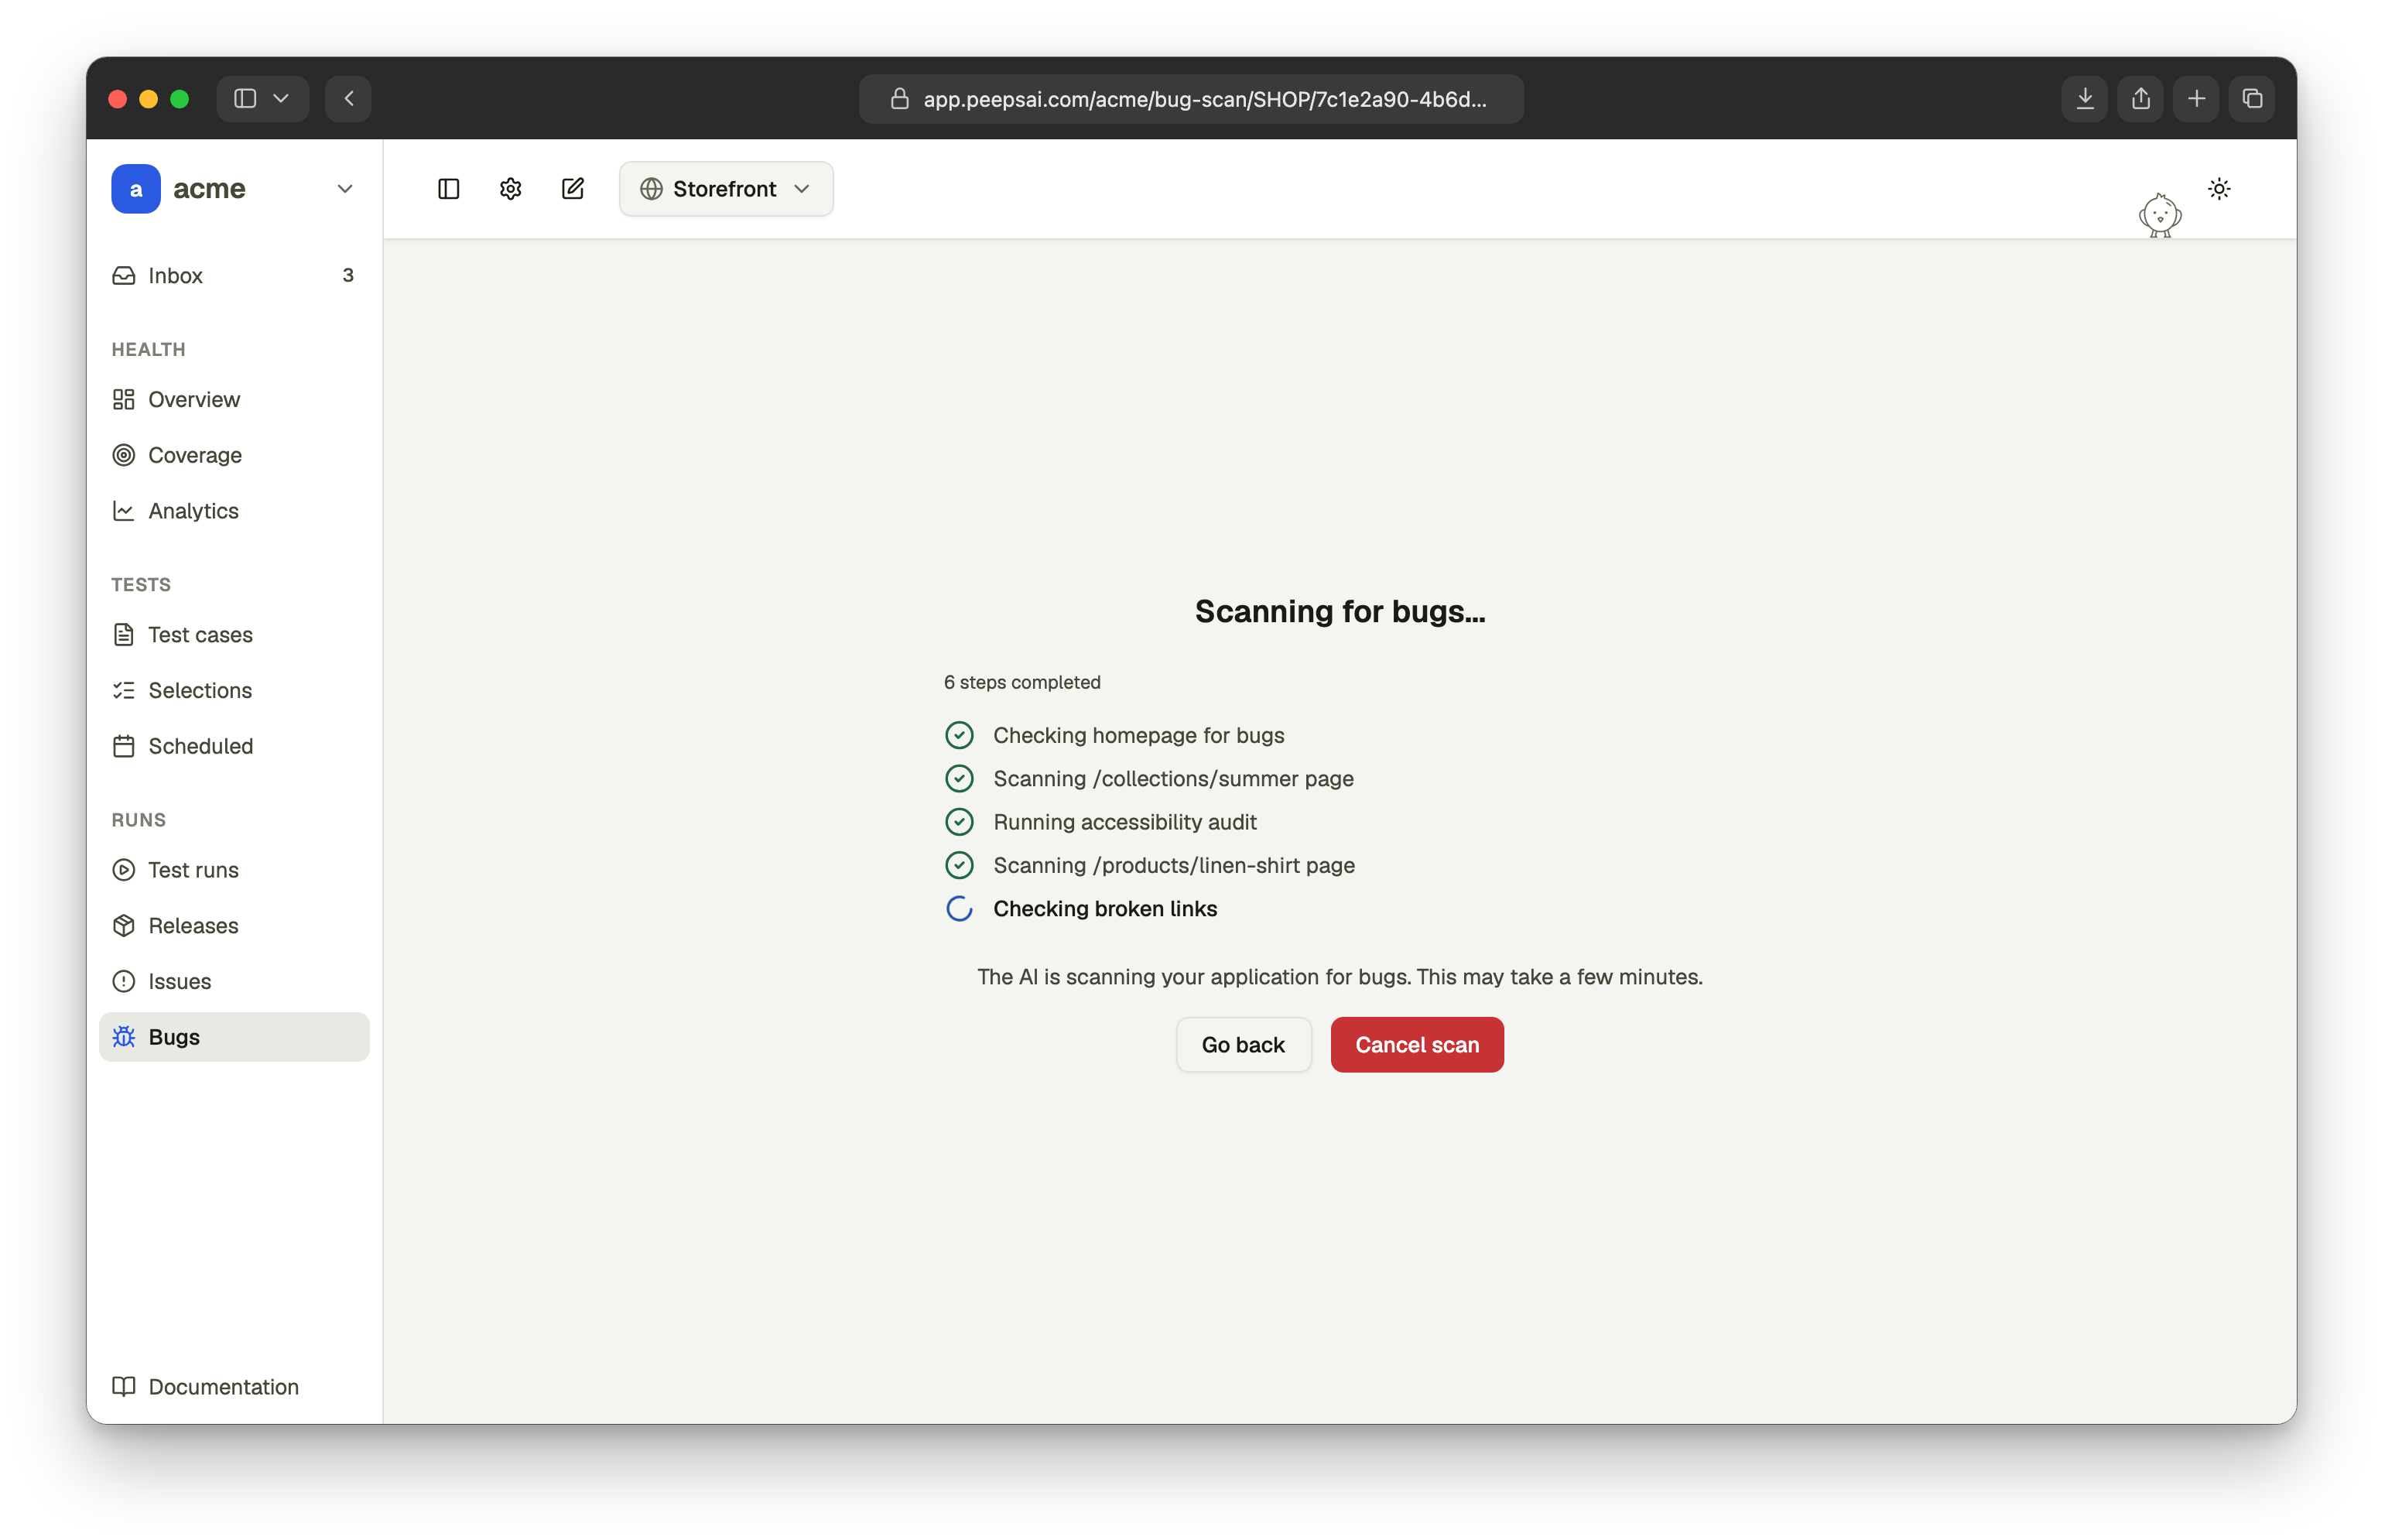
Cancel a scan
Click Cancel scan on the progress page. The scan stops and is marked cancelled. A cancelled scan’s results aren’t saved.If a scan doesn’t start
Peeps shows Failed to start bug scan with the reason. The most common ones:- A bug scan is already running for this project. Wait for it to finish, or cancel it.
- None of the selected documents have extracted text available yet. Wait until the document shows Extracted, then try again.
- Please enter a valid URL. Check the address, for example
https://staging.example.com.
If a scan fails
The progress page shows Bug scan failed. Common causes:- The agent couldn’t load your app. Check that the URL is reachable from the internet, not only from your network.
- The sign-in environment was deleted after the scan was set up. Start a new scan with an existing environment.
- The agent couldn’t finish its report in time. Narrow the scan with Restrict to specific areas only.